Monday, August 5, 2013

Final Project : Altered Reality

 
[ D U E ]
 
 
August 8
 
A photo of your location of choice
for the final project/project 6.
Decide soon! So you can spend
the rest of your time 're-visualizing'.
Post to your blog with an explanation.
 
 
August 12
 
Your final project!
Turned in with the parameters
discussed below.


August 15
 
Your essay and visual
presentation, as discussed
nearer to the beginning
of the summer course.
 
We will also consider
the elements pertaining to
a pot luck lunch amongst us!
 
 
.
 
 
F I N A L  P R O J E C T
 
Altered Reality / 3D Perspective Modeling
 
Inspired by this extension of the New Aesthetic reading:
Dear Photograph (Tumblr), http://dearphotograph.com/
 
Modeling the architecture we see every day.
Through a digital tool. 3D modeling.


Above two : From dearphotograph
 
Below two : Food for thought.
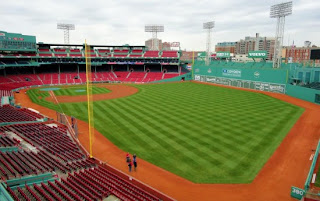


To find a link between solid architecture, 3D modeling fundamentals, and creativity, you are to 1.) capture a photo of your choosing of a "reality" that either intrigues you or you may wish to change. Then 2.) to the best of ability recreate that photograph in cubic, 3D perspective using what you know of spatiality and estimation of real space. The result will be splicing between reality and fantasy... where your 3D modeling is matched in a small window to your real photograph. Or interpretation as well, even utilizing Photoshop techniques you acquired at the very start of DM1. Even the concept is malleable : past and present, color and monochrome, and so on.
 
One hour example I completed-
 
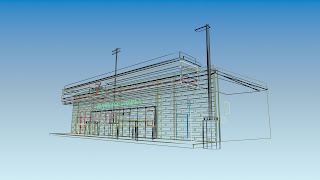
1.) Actual photo. 2.) My model, all using basic prims colored a single color. 3.) My splicing, with creative liberties. 4/5.) A bonus rendering.


All this is of a 7-11 some odd paces above my
apartment, and West of north campus.
I should hope you find a more nostalgic
or inspiring choice of location
(even though for me it actually
holds meaning; e.g., Oklahoma..).
 
 
SPECIFICATIONS
 
The Turn-In:
-On your blog, by due date. These items-
Original photo, an image of your model, the final splice of them, and an artist's statement.
 
The Photo:
-Original photo must be at least 1200px or any side. Minimum : 1200x1200.
-Suggested is that you choose a location with defined edges and 'blocks' you can base a cubic modeling off of. My 7-11 photo actually suffices as a questionable example.
-Find a location that you may recognize, to reference often in your model.
 
The Model:
-Absolutely no limitations in emulating, via 3D modeling, what the photograph looks like. Using basic commands in Blender, cube it up to fit your real architecture.
-Resolution : Any. As long as it looks high quality atop your photo.
 
The Splice:
-Should aim for 1200x1200 as well.
-At least 25% of the canvas covered by your 3D model image.
-Make the final splice relatable to initial photograph...
-...but you may also take liberties and 'altering reality' (hence, title).
-You may make altercations in Photoshop as well, within reason.
 
Beyond that, this final project is up to interpretation. And with limited time, so do get started!


Check this out as well for more inspiration!


Tuesday, July 30, 2013

Blender : A Brief Primer, and FAQ


Blender 3D : A Direct Primer, Benjamin Poynter

1.) Navigation.
-Middle Mouse Wheel to Zoom In/Out.
-Shift + Middle Mouse Press to Strafe.
-Alt + Left Mouse Press to rotate around.
-(If number pad available, 8-4-2-6 to adjust view intricately.)
-CONTROL + Z to undo.
-Left Mouse Press to position center of world rotation.

2.) Modes.
-[Find a toolbar widget with a drop down "Object Mode" menu.]
-OBJECT mode. Where you can just move around solid meshes. For example, a cube.
-EDIT mode. Where you can actually extrude/morph/edit meshes. We can 'change' a cube.
-To note, in either mode, next to "Object Mode" menu, you can toggle wireframe/solid views.
-TAB switches from OBJECT to EDIT easily as well.

3.) Selecting.
-[a] to select/deselect all objects.
-In OBJECT mode, Right Mouse Press object to select it.
-To select multiple objects, or deselect one, hit Shift + Right Mouse Press.
-In OBJECT mode, you can shift-select multiple objects. In EDIT mode, its a different story.
-To delete, have selected and press [x]. In EDIT mode, you can delete specific details.
-To duplicate selected object, Shift + [d]. Move newly duplicated object.
-Lasso selection, if desired : Hold down CONTROL and Left Mouse Press. Drag around.

4.) The Gizmo & Moving Objects.
-The gizmo is the red-blue-green icon you use to morph object. Appears when object is selected.
-XYZ coordinates. Think of X and Y as flat. (X, west/east ; Y, north/south). Z is sky/ground.
-[Near the "Object Mode" drop down on its respective toolbar is a SMALL red-blue-green icon.]
-Arrow Icon : Move selected object directly along the rails of XYZ coordinates. Click & drag.
-Curve Icon : Rotate selected object in its center. Click & drag the now different gizmo.
-FAQ! To re-center rotate/pivot on object, reposition object in edit mode! Pivot remains still.
-Line+Square Icon : Rescale select object along XYZ coordinates.

5.) Editing the Mesh. <Needs to be done in EDIT MODE.>
-Vertex = point two edges cross. Edge = point two faces cross. Face = Open space/polygon.
-On same bar as Modes and XYZ commands, find Vertex-Edge-Face icon selections.
-You can (right click) select them. Click and move, rotate, and scale them. Experiment!
-Multiple selection rules with Shift + Right Mouse Press apply here as well. [a] to deselect.
-Important : Subdivide = CONTROL + [r]. Cut a Face in place to create more vertexes/edges.
-While you have a neon "subdivide line" previewing your cut, scroll Middle Mouse Wheel to
  create more edges in your cut. Left Mouse Press to cut. You can move cut. [a] to end sequence.
-Extrude tool is the [e] key. Extends/duplicates selected vertex/edge/face.

6.) Rendering an Image Output.
-First, you want to light your photo well. By File.. Add -> Lamp -> Choose Type. Experiment!
-Note CAMERA placement. View -> Camera to see what camera sees. View -> Align -> Align Camera View to Ours. To make 'our' view cam's. Adjust camera externally with gizmo if need.
-Pro tip for scene views : View on toolbar -> Selections (Top, Left, 'Camera', Etc.).
-Get an image photo-file! At top by file : Render -> Render Image. Or F12.
-You'll get preview. Default size : 960x540. F3 to save file of image. Or Image -> Save As.

These are the complete barebones of Blender 3D. All you'll need to get started!


.


F R E Q U E N T L Y  
A S K E D  
Q U E S T I O N S
( b l e n d e r )


This will be an ongoing post. I will attempt to physically address each issue as they come up or in timely fashion. Via email or otherwise.

1.) ((How to rotate view of world/objects, if I can't from primer instructions.))

 (Two images for reference!)

Version 2.5 (-) . Drag down the top line between main 'Blender' title bar and 'File' bar. It should expose a large menu. In the middle of it, click "Emulate 3 Button Mouse" to where it is on.
Version 2.5 (+) . File -> User Preferences. INPUT option on bar. On left, scroll and click "Emulate 3 Button Mouse" to where it is on.


2.) ((Create object in space to edit other than a cube?))


Top Left bar; Add -> Mesh -> choose (Cube, Sphere, Cylinder, and Many More)


3.) ((How may I combine objects in space?))

Select both and hit (Ctrl + J). Should be prompted to combine. Hit okay.


4.) ((Apply color/texture to object?))

2.5 (-) (Should be applicable to 2.5+ as well.) . Follow these steps.


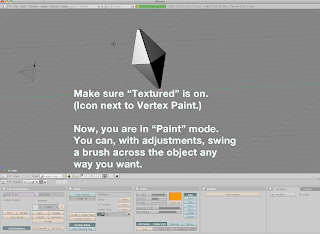
5.) ((A useful brush-coloring tool (Color multiple polygons of object?))

2.5 (-) (Should be applicable to 2.5+ as well.) . Follow these steps.


To be continued.

.

Project 5 : Geometric Self-Portrait


D U E


August 1 :

Reading (The New Aesthetic)
and selection of Tumblr post/reasoning
as a post to your class blog.

August 5 (EDITED) :

 Project 5!

In addition, comments for peers
not already posted to their blogs.
Projects 1, 2, 3, and 4. I will finally
be able to check for those.


★ ★ ★ ★


P R O J E C T  5


Geometric Portrait, Using 3D Modeling


"Learning About Blender 3D and Self"


Blender 3D is a freeware program! Downloadable from the official site, for PC or Mac. Heavily encouraged is a three button mouse (left button, right button, middle wheel) to help you out. Lab has plenty already connected to monitors.

*Now the "3D World". With Blender 3D, we will be employing a technique called "box modeling". In laymen's terms, a very lo-res method of 3D modeling that is typically a precursor to a more defined model. However for our purposes and parallel to the ideas from "The New Aesthetic", we are going to be chivalrous to the concept of 'cubes' and 'minimalism'.

Workflow of Project 5

1.) Explore the fundamentals of Blender 3D (program)! A tutorial post I've written containing everything necessary to completing assignment follows this one.

For the record, the version of Blender I have employed for the write-up is 2.56. Fundamentals may apply if a different version, but be sure. Working computers in lab should have Blender installed.


2.) With techniques and fundamentals in mind, develop project. You are to create a self portrait. Additionally, a portrait of yourself you believe would be perceived from the lens of a machine. Geometric in nature. This is where the cubist visual-minimalism comes in handy for the college student without enough time to create a million-polygon rendition. You may be very, very liberal in your approach to your machine-esque self portrait. It may be your head or face. It may be a certain character or closely related object to you which summarizes your being. But it is self portrait. In your statement, think hard about why it relates to you.

3.) The method of turn-in : Five snapshots rendered from Blender and posted to your blog. This way : One front-view, one back-view, one-side view, one-top view, and angle of your choice. Also, of course, the artist's statement.

Silly example...


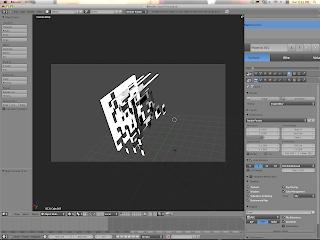
This is just an example I did (playing with the whole 'other things are me' schtick) inspired by Michael Murphy's work. I took a zoomed up pixel shot of Sonic from 1991, even further bitmapped it to look more primitive, and distorted the individual pixels by deleting 'polygons' from panels it mapped the image onto.

A less silly example...


This is actually refuse of a current project I am working on, where I consider a 'fictional' game character to be a self portrait of me, through the narrative. In a way, I consider old videogames to be 'story generating devices', because the old 8/16 bit characters don't have a deep mythos to them. I am left to insert my own emotions.

A good page to see geometric "self-portraits"-

The Polygon (tech website) 'about us' page. Full of staff, 'derezzed'-


Links for inspiration-


It is easy to be discouraged at first. That is why you have extended time than usual to practice. Start slow. Build up. Don't expedite any steps that seem important.

Once you realize 'modeling' is nothing but moving, rotating, and scaling a series of bent boxes, the fundamentals take on more complex and understandable forms naturally.

.